
Does your Gaming PC turn on, but there’s no display? Or perhaps your PC doesn’t turn on at all?
When a computer doesn’t turn on, we need to perform several tests to verify if the computer has power. We need to start in the external environment, such as the power outlet and power cables that connect the computer to the power source. After we ensure that these are working, it’s time to look into the internal parts like the power supply (PSU), power switch, and motherboard.
Since computers are complex machines made up of numerous components, diagnosing every possible issue might not be easy. Rather than checking whether each component works, here is our troubleshooting guide that will help you identify why your PC won’t power on and then fix it.
Table of Contents
10 Step-by-step Tips to Fix Computer That Won’t Turn On
Here is a step-by-step tutorial on troubleshooting, diagnosing, repairing, and fixing a computer that won’t turn on.
1. Check for Power Supply Issues
Many of you may find this hard to believe, but the number one reason a computer won’t turn on is that you didn’t even turn it on! The first step when troubleshooting a dead pc should be ensuring that the computer is getting power in the first place.
If there are no blinking lights and running fans, and nothing appears on the screen, the culprit is likely a power issue. Start by examining the entire length of the power cord for tears and dents or worn-down insulation. The power cord is probably faulty if you find any flaws or the power brick smells like burnt plastic.
If the AC adapter is okay, but your newly built gaming PC won’t post, ensure that the power switch at the rear of your power supply unit is on. If that isn’t the issue, ensure your plug socket isn’t at fault by plugging it directly into the wall socket.
If your PC won’t power on after this, the power supply unit (PSU) in your PC has likely failed. However, before replacing your power supply, be sure to confirm that you indeed have a dead power supply unit. An ozone smell or a high-pitched noise, combined with no power in your computer, is an almost sure indication of a fried PSU.
In some cases, the input voltage for your power supply unit may not match the correct setting for your country.
2. Internal Wiring
If your new PC is getting power but still won’t turn on, you need to check whether there are any loose or malfunctioning cables inside your build. If your PC doesn’t power on after building it, poorly connected components may be the reason why, especially if you are a novice PC builder. Always ensure they click in all the way.
If you’re using a prebuilt system, beware that opening your PC could void your warranty, so make an aim of contacting your supplier for advice before proceeding.
Safety first! Always start by disconnecting your PC from the power outlet before opening your computer.
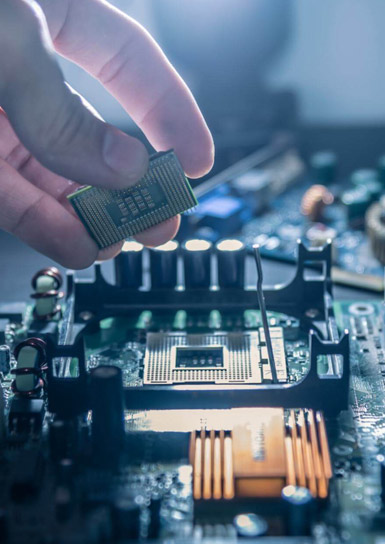
After opening your computer case, check whether the connections between your PSU and the main components are well fixed. If you have a Modular PSU, check the connections on both sides. Afterward, ensure that all your components are correctly seated in their respective sockets. Ensure that the graphics card, the RAM sticks, and the CPU heatsink are all well connected. Also, plug in the CPU cable and the 24 Pin motherboard cable.
You could also try booting the PC without all components, for example, the graphics card if your CPU has integrated graphics. Also, switch between your RAM sticks in case one of them is faulty. If you feel you aren’t competent enough to do this yourself, you should ask a friend for help. You could also take your computer to a repair shop and ask them to do it.
3. Power Button
So, your PC won’t boot, but the motherboard lights are on?
The motherboard usually indicates with an LED light if it is getting power. If this happens but the fans don’t spin, the problem likely lies in your computer case’s power button or the wire linking it to the motherboard. To get your PC to turn on when you press the power button, you need to connect the power switch to the motherboard properly. If the two aren’t connected, nothing will happen when you push the power button.
Among the numerous cables in your case, you’ll need to look for a two-pin connector, which is usually marked PWR SW. Have a look at your case’s manual if you’re unsure. Once you find it, where do you connect the power button switch wires?
The power switch wires need to be attached to the power jumpers on the motherboard, usually located on the bottom-right section of the motherboard. Since these pins are usually unmarked, it is probably wise to use your motherboard manual, as there should be a nice diagram that shows what goes where.
4. Disconnect All Non-Essentials
If none of the above seem to work, it is time to eliminate external hardware. One of your peripherals could be the reason why your PC won’t start.
Shut off your PC and disconnect all the external hardware from your PC. Such peripherals include flash drives, joysticks, and audio systems.
Start your computer with only the keyboard, mouse, and display connected (if using a desktop). If it starts up successfully, turn it off and reconnect a peripheral, then start it again. Keep doing this until you discover the culprit.
5. Let the Battery Charge
Did you put away your laptop for some time, and now it won’t turn on? You then plugged into the power socket, and it still won’t turn on?
Don’t worry, as your laptop is probably okay; its battery has just completely drained. To get your laptop to start, let it charge for about thirty minutes before trying to turn it on again.
6. Check Your Display
“My PC appears to be running, but nothing is showing on the screen; what is wrong?”

We get many similar calls from people, and in many cases, it is usually a screen issue. People commonly assume their computer is off when it isn’t just because the screen itself is black. Your computer may be malfunctioning simply because of a faulty screen. Make sure it’s not a screen issue by ensuring the monitor is on and connected to the PC. If you have a dedicated graphics card, connect your monitor to that instead of the motherboard.
In some cases, the monitor might get power and be well connected but won’t show anything because someone accidentally set the brightness to zero.
Have you owned your laptop for several years, only for it to die one day and refuse to start?
If the laptop’s display doesn’t show anything but the power and keyboard keys light up, your laptop’s display adapter could be the issue. If that is the case, you’d need to get the adapter replaced by a computer technician. An easy way to test for a faulty display adapter is by plugging an external monitor into your HDMI or other video output port.
7. Decrypt the POST and Beep Codes
When you turn your computer on, does it promptly power back off?
Maybe it doesn’t power on, but some or all of the lights on the internal hardware turn on or flash, then suddenly stop. You might also hear the fans inside your computer turn on. So, how do you fix a computer that turns on and then off?
Some motherboards come equipped with Power on Self-Test (POST) codes and beep codes. These are audio and visual cues whose purpose is emitting a particular signal (beep code) via the system loudspeakers to alert you why the computer isn’t passing the POST.
There is no standard POST and beep code system, so you’ll have to check your motherboard user manual or online to see what the codes on your computer are communicating.
8. Explore the BIOS or UEFI Settings
BIOS Updates
If your PC appears to turn on but won’t proceed to boot to Windows, then it might be worth it to check if your BIOS is up to date.
The BIOS (Basic Input/Output System), which motherboard manufacturers replaced with the newer UEFI (Unified Extensible Firmware Interface) technology in most recent PCs, is essentially an interpreter between your computer’s operating system and its firmware.
If you’re building a PC and it won’t start, it could be because the BIOS doesn’t recognize the new processor. If you don’t update the BIOS, the PC will refuse to boot. However, you’re in luck as you can update your BIOS to the latest version even if your PC doesn’t post. The process varies from one motherboard manufacturer to the other.
BIOS Settings
Sometimes, your BIOS may be up-to-date, but the computer still won’t start. In this case, you need to access the BIOS or UEFI and check for any unusual settings preventing your computer from starting.
So, how do you access the BIOS or UEFI? After starting your PC, press the key indicated briefly on the startup screen to enter your BIOS Setup. It could be Esc, F1, F2, F8, F11, or F12.
9. Try Safe Mode
If you can access your BIOS, but Windows 10 won’t start normally, you have the option to start your PC in Safe Mode. The Safe Mode feature in Windows allows you to start your computer with only the essential files and drivers it needs to run.
Booting in safe mode is essential when troubleshooting a computer that won’t start as it allows you to narrow down on the problem by disabling most of the computer’s features.
To start your PC in safe mode in Windows 10, you have to interrupt the boot process three times to open the Windows’ special boot options. A simple way to do this would be:
- When your computer is off, press the power button to turn on the PC.
- Immediately something appears on your computer’s monitor, press the power button for 10 seconds to turn your computer off.
- Repeat this three times
- Press the power button and don’t interrupt the startup. You will enter the Windows Recovery Environment.
- On the Choose an option screen, follow these steps to restart your PC in safe mode. Select Troubleshoot > Advanced options > Startup Settings > Restart.
- After your PC restarts, select Safe Mode with Networking.
Once your computer starts in Safe Mode, undo any significant changes you made to your computer. That includes removing any recently added hardware, too.
By resetting your PC to its factory default settings, you might be able to improve the performance of your computer.
To reset your Windows 10 system to its factory default state, navigate to Settings > Update & Security > Recovery. You should then click “Reset this PC.” Before attempting a reset, make sure you backup all your files.
10. Check for Ransomware or a Virus
Is your PC acting strange all of a sudden? You may be the victim of a ransomware attack. The reason your PC won’t start properly may be a result of poorly coded ransomware encrypting, deleting, or relocating data that your PC needs to function correctly.
To get rid of unwanted software, don’t boot from the internal storage drive where you have Windows installed. Instead, use a bootable USB drive. So, how do you boot your Windows 10 computer from a USB drive?
- Start your PC on and press the key needed to enter your BIOS Setup. It is usually Esc, F1, F2, F8, F11, or F12.
- Once you’re in the BIOS, find the boot menu, then the boot order controls. You’ll then move the USB drive to the top of the list.
- Save your settings and restart the computer.
When your PC successfully starts, use anti-malware software to inspect your computer.
Have you followed all the troubleshooting steps stated above, but nothing appears to fix your problem? Before you give up on your PC, call Mobile PC Medics now for a free diagnosis and consultation from the best computer specialists California has to offer.
Mobile PC Medics specializes in professional computer, mac, and Laptop repair, upgrade and support service to all areas of Ventura & Los Angeles Counties. Call us now at 818-307-6868, and we’ll diagnose and repair your desktop or laptop computer quickly and reliably at an affordable rate.